This is the first sewing tutorial I've ever written. I almost gave up several times!

Supplies:
Outside Fabric - 1 piece 9"x12", 1 piece 9"x18", 1 piece 7"x8 1/2",
1 piece 2"x14", 1 piece 3/4"x5"
Lining - 1 piece 9"x12"
Interfacing - 1 piece 9"x12" and 1 piece 7"x4 1/4"
1 Button
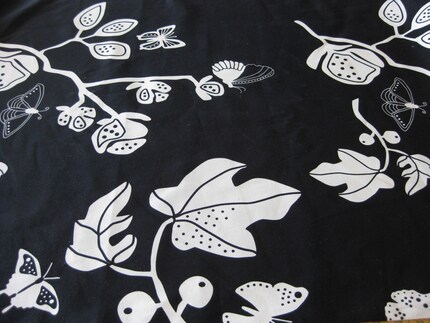
I'm using Flowers for Emma (Anne Sutton for Henry Glass) with cotton broadcloth lining
The interfacing is Pellon Fusible Fleece
The button is a 9/16" mother of pearl with a metal shank
1) Fuse the Interfacing:
Following the manufacturers instructions, fuse the 9"x12" interfacing to the 9"x12" outside piece. Fold the 7"x8 1/2" patch pocket piece in half (right sides out) so that it measures
7"x4 1/4" and fuse the 7"x4 1/4" interfacing sandwiched in the fold of the patch pocket piece.
2) Patch Pocket Piece:
The patch pocket piece is now 7"x4 1/4", with a layer of interfacing inside the fold. There's a fold side, and three open sides, two short and one long. Unfold the patch pocket piece and refold so that the right sides are together and the interfacing is clearly visible fused to one side. Sew the patch pocket piece on two open sides (one short side and one long side), with right sides together using a 1/4" seam allowance. Turn right side out again through the un-sewn short side and top stitch the top fold edge. This keeps the interfacing from moving. Press flat.
With the outside piece face down on the table (the fused interfacing is clearly visible), measure up 4 1/2" from the bottom. Fold along this line and pin. This will help determine the pocket piece placement. Place the BOTTOM (non-fold side) of the pocket piece 1/2" from the fold line, making sure the top of the pocket piece is about 3/8" from the top (see the picture as all this top and bottom stuff is confusing). Pin, unpin the outside piece from itself, and topstitch the 3 non-fold sides of the patch pocket piece, turning the unseamed short side in as you go.
Photo - Unturned Patch Pocket, Folded Credit Card Piece, Folded Outside Piece

3) Credit Card Piece:
Fold 1/2" to the back of the 9"x18" piece and press. Next we are going to fan fold the fabric to allow for 3 credit card pockets. With the fabric face up, measure 2 1/2" from the top where the 1/2" fold is and fold the fabric face up on itself (press as you go), then fold the fabric back down 2", up 2 1/2", down 2", up 2 1/2" down 2". at that point fold the rest of the fabric under at least 1/2". Press well.
Place your credit card piece on the right side of the lining 3" from the top and pin well. Stitch a middle line to divide the credit card pocket into two equal halves. Top stitch the top and bottom of the credit card piece. Baste the sides at the seamline.
4) Round the Flap:
Pin the outside with the pocket to the lining, wrong sides together. Then, trim of the corners off the flap (the short edge that does not have the pocket on it). I usually eyeball it but I've used plates and pans too. Make sure not to take too much off the top since the flap will neet to comfortably fold down over the patch pocket.
Photo - Credit Card Piece on Lining, Finished Patch Pocket

5) Strap and Button Loop:
Fold the 2'' wide strap piece and the 3/4" wide button loop piece in half lengthwise and then tuck the edges under to make a double fold binding-like wristlet strap and button loop. Topstitch each 1/8" away from the edge. Topstitch the strap (now 1/2" wide) 1/8" away from the fold edge as well. Zigzag the ends of the strap together to make a loop and turn so the zigzagged edge is inside the loop. I didn't take a pic of this step, but I made a small stand-in and snapped a couple pics.
Photos - Left, Zigzagged Strap - Right, Turned Strap


6) Putting it all together:
There are now 2 main pieces: the lining with the credit card pockets near the top of the purse, and the outside piece with the interfacing on the back side and the patch pocket on the right side. With right sides facing, pin the outside piece to the lining. The patch pocket and the credit card pocket should be inside and the interfacing and lining wrong side will be outside. Fold the button loop in half. Insert the loop inside, between the front of the lining and the front of the outside fabric (in there where the pockets are). 1 to 1 1/2" of the loop should be inside the seamline. Trim off the edges even with the fabric edges, and pin and baste.
Sew around the edges, making sure to leave an open area for turning. Turn, press flat, and topstitch across the top of the credit card pocket to keep it in place. Topstitch close to the edge around all sides (folding in your open area as you go) and again about 1/4" from the edge on just the flap area. Be sure to double stitch the button loop once or twice. The button loop should protrude from the flap about 1 to 1 1/2". As you can see, I forgot to add the button loop and had to add it later ;-)
Photo - Almost Finished Outside and Inside


With the stitched inside/outside piece flat on the table, outside down (you can see the lining and credit card pockets), fold the bottom part up like an envelope until the pocket piece can be fully seen and the credit card piece is fully covered. It will look like an open envelop with the flap still up. Pin the sides together, insides still inside. Add the strap to the right side seam (pinch the edge of the strap with the zigzag turned in and insert into the sideseam near the top) and pin. Now, topstitch both sides as close to the edge as possible. Fold down the flap to determine button placement and sew on.
Photos - Finished!


..and my primitive label :)
Spool {}


 ..and my primitive label :)


 out of it. Here's the collection so far - a tote bag for my daughter's 1st grade teac
 her (my design), a box for my Brother-In-Law's Significant Other (It looks like Amy Butler's box, but I didn't follow the directions), and a Book for my Husband's Niece (my interpretation of Sue B's lesson)! I'm almost out of fabric now. The last item on the list is still to come :)
 Craftlog's Duct Tape Dress Form


